
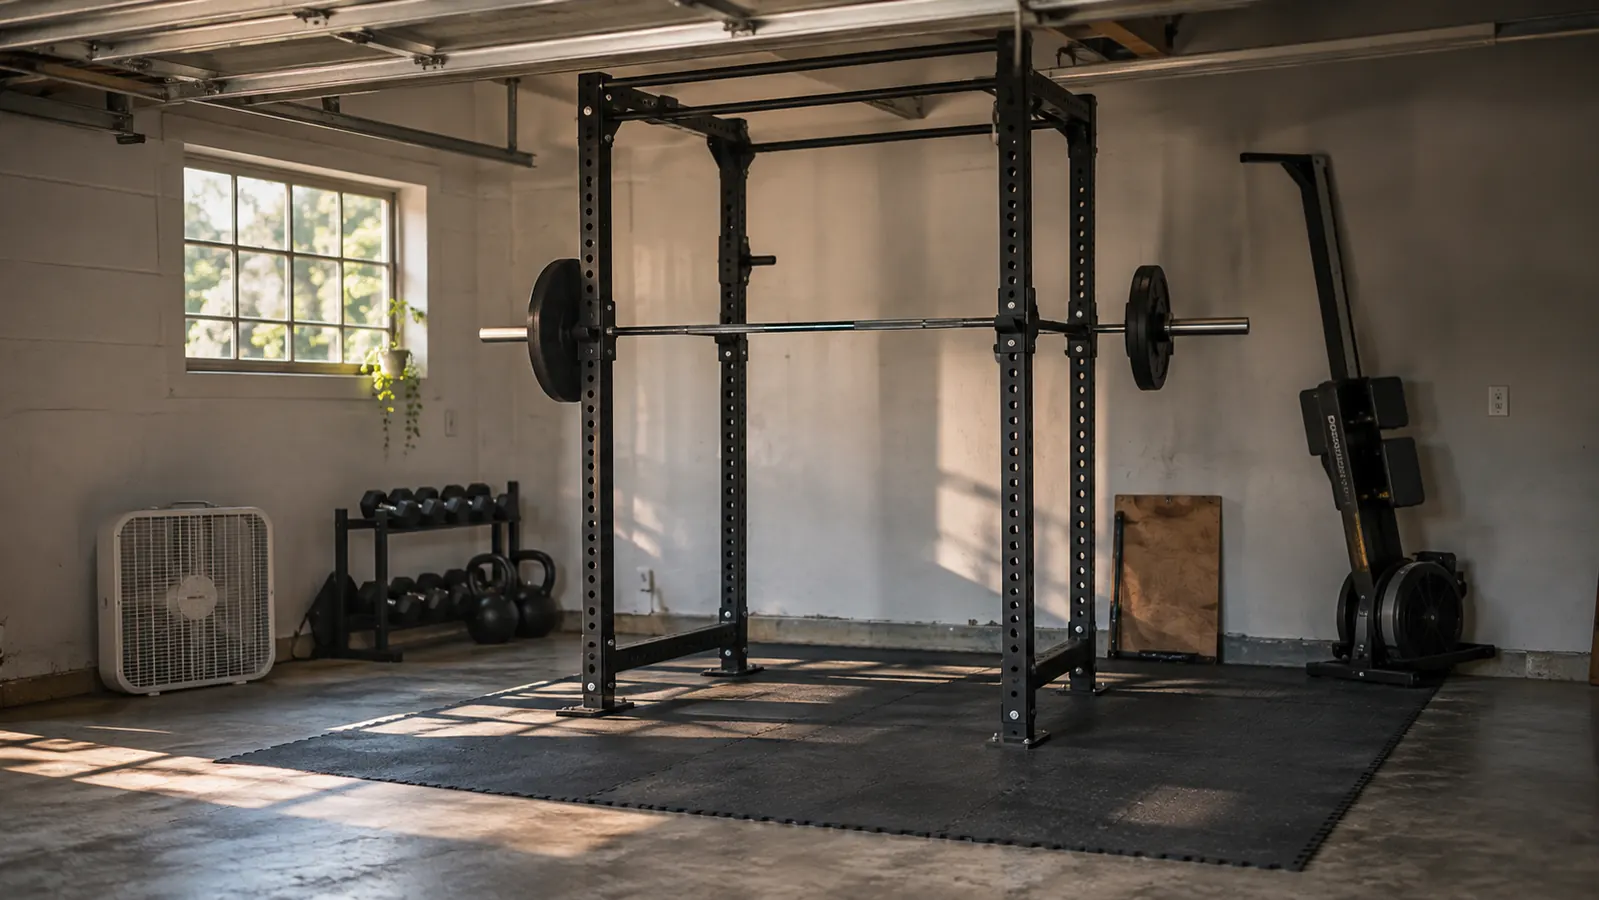
I bought the CAP Power Rack Stand with Pull-Up Bar in October 2023, a week after the rubber flooring went down in the left bay of my garage. Two years and four mornings a week later, it is the piece of equipment I would replace first if the house burned down. Not because it is fancy. Because it answers two questions at once: where do I squat, and where do I hang.
Most garage gyms get built backwards. A person buys a bench and a set of adjustable dumbbells, adds a doorway pull-up bar, then spends a year working around the gaps. The doorway bar limits you to the height of your hallway and eats the trim above the door. Squat stands are honest equipment and I have nothing against them, but they become a two person tool once the weight gets real, and I train at 5:30 in the morning with nobody in the garage but me and a box fan.
The CAP rack is 46 inches wide, 50 inches deep and 85 inches high assembled, built from 11 and 12 gauge steel, and it weighs 59.51 pounds. It has a built-in pull-up bar and weight storage on the frame. That is close to the whole spec sheet and it is enough. Everything below is what those numbers meant in an 11 by 20 foot bay with an 8 foot ceiling, a truck in the other bay, and one window.
One footprint that covers squats and pull-ups
46 inches wide, 50 inches deep, 85 inches high, with a built-in pull-up bar and weight storage on the frame. It stands on the mats without a single bolt into the concrete, which matters when you rent the space or plan to move the rack twice before you are happy with it.
Amazon Check Today's Price on Amazon →Step 1: Measure the bay with tape on the floor, not in your head
The rack is 50 inches deep. That is more than you think it is until you see it. In my bay I laid two 4 by 10 foot rubber rolls side by side for an 8 by 10 foot lifting area, and the rack sits on those mats with room in front for a bench and a couple of feet behind it to step back into. The truck still parks in the right bay. That only works because I measured the swing of the garage door and the width of the truck mirrors before I ordered, not after a box was sitting in the driveway.
Walk the footprint out with masking tape. Put down a line at 46 inches wide and another at 50 inches deep, stand in the middle of that box, and see whether you can lie on a bench inside it without your feet in the doorway. If the box does not fit your space, no rack on the market will make it fit, and you are better served by squat stands and a wall mounted bar. Measure twice, order once, and skip the part where you sell a rack at a loss on Marketplace.
Ceiling height is the other number and it is the one people forget. My ceiling is 8 feet, which is 96 inches. The rack is 85 inches tall, so I have 11 inches of air above the top of the pull-up bar. That is not a lot and it dictates how I do pull-ups, which I get to in step five. If your basement ceiling is 82 inches, this rack does not go in there standing up, and no amount of enthusiasm changes that arithmetic.
Step 2: Assemble it flat on the floor, then stand it up
The CAP box is 47 by 12 by 5.5 inches and it is heavier than the finished rack sounds, so get it into the garage before you open it rather than dragging a half unpacked frame across good flooring. I assembled mine alone on one Saturday afternoon, about two and a half hours, with a socket set, a rubber mallet and a lot of flattened cardboard on the concrete. Two people would cut that time down. The top section is the part that wants a second set of hands, and I got it up alone by being stubborn and slow.
Do not tighten anything all the way until the frame is standing and square. Run every bolt hand snug first, lift it upright, push it down onto the mats so all four feet are carrying load, then go around and torque everything. If you tighten as you go, you will end up chasing a rack that sits on three feet and rocks, and you will blame the rack for something a wrench did.
I bolted nothing to the floor. It sits on the rubber mats, which is enough grip for squats at the weights a home lifter actually handles, and it means I can shift the whole thing six inches left when I want the wall back. The tradeoff is real: a rack this light will move if you get careless with a bar, and it will tell you about it. Check your bolts after the first month and again at six months. Mine have not backed out, but the check takes four minutes.
Step 3: Put it where the bar path stays clear
Placement is not decoration. The bar comes off the rack and travels straight up and down, and anything in that column is a problem: a shelf, a bike hanging from a hook, the garage door track, the cord on the space heater. I set mine on the left side of the bay with the pull-up bar running parallel to the garage door, which keeps the path clear and keeps the truck out of my line of sight while I squat.
The thing I got wrong was leaving too little room behind the rack. You want a couple of feet to step back into, because the moment you take the bar out you want to be able to move, not shuffle. I slid mine forward about 8 inches in the second week and stopped clipping the shelf with my elbow on the way up.
I press overhead outside the rack, in the open part of the bay, and even there I check clearance before I add a 45 to each side. An 8 foot ceiling becomes a real constraint once a bar goes above your head and the plates add diameter. The rack does not solve that and it is not supposed to. Squats and pull-ups are the two jobs it handles in my garage, and it handles both without asking for more floor.

Step 4: Use the weight storage and keep the walking lane empty
The rack has weight storage on the frame and I use it, but 230 pounds of iron does not all live there. The plates I am loading that morning go on the storage, the rest stay stacked against the wall in the order I reach for them. That is not a system, it is a habit, and the habit is what keeps an 11 by 20 foot bay walkable with a bench, a rower and a truck sharing the space.
Keep one clear lane from the door to the rack and store nothing in it. My bay holds the rack, a bench, a pair of adjustable dumbbells on their trays, a rower that folds against the wall, and a vehicle. It works because there is a path. Every garage gym I have seen fail, failed the same way: the floor filled up with gear and boxes, and the owner quietly stopped going out there in January.
Dust and damp are the other thing nobody warns you about. Bare steel and iron plates in an unheated garage will leave rust rings on a rubber mat if a plate sits wet, so I wipe the bar down and I do not stack plates where rain blows in under the door. Two years in, the frame has held up and I have done nothing special to it beyond that and the bolt checks.
Step 5: Set up pull-ups you can actually do with 11 inches of headroom
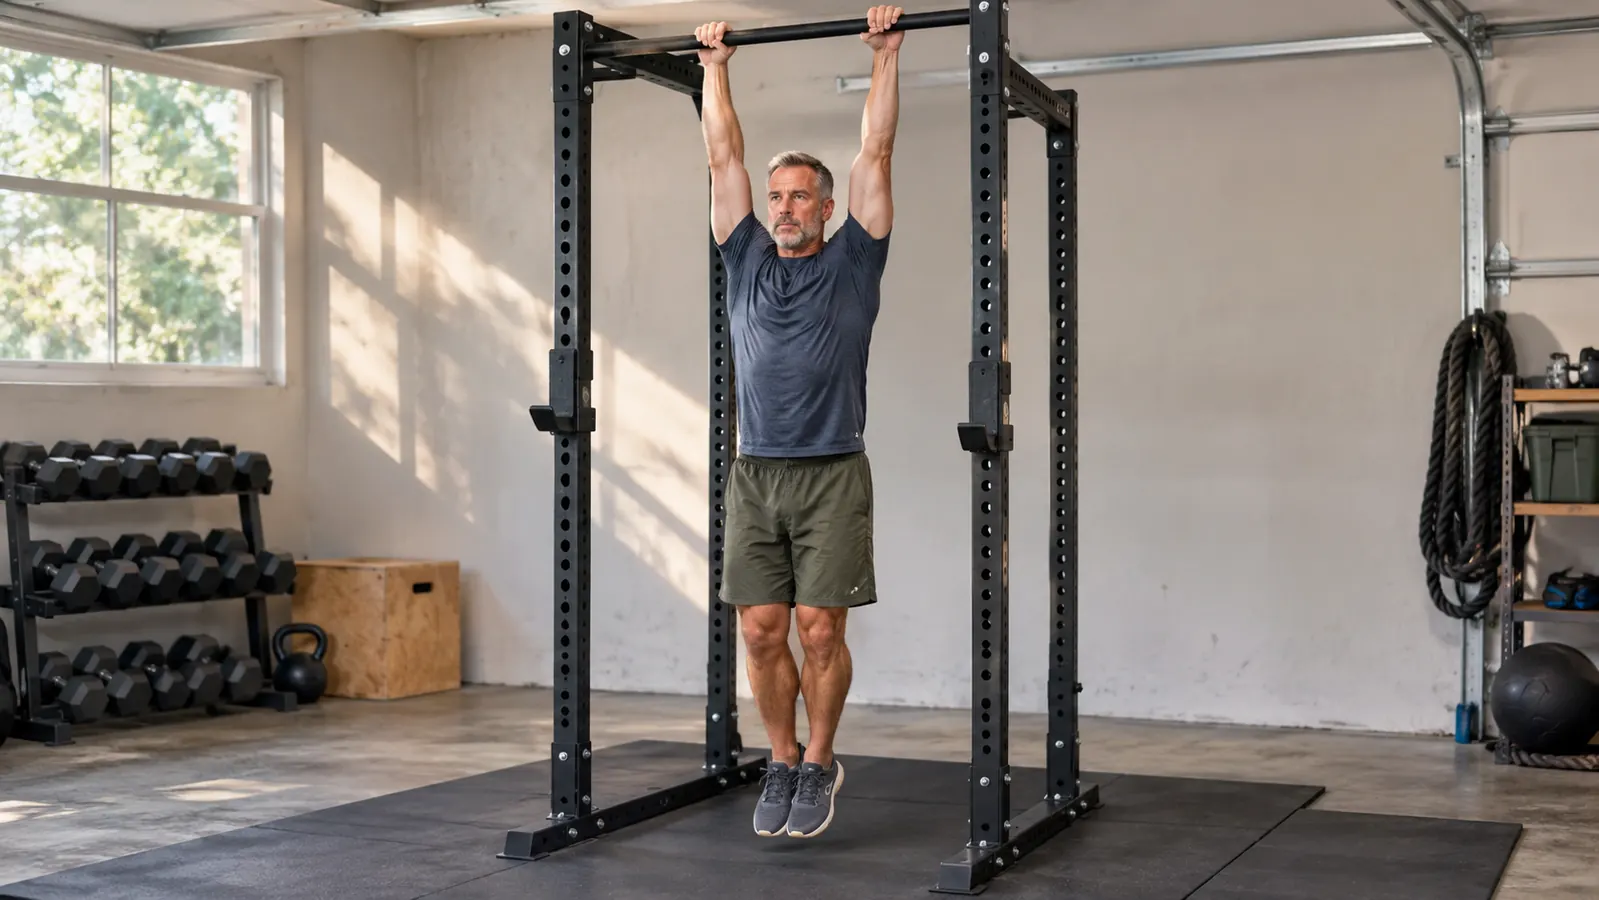
The built-in pull-up bar puts my hands at roughly 7 feet. With an 8 foot ceiling that leaves about 11 inches of clearance, which means strict pull-ups, full stop. Head forward, chin over the bar, no kipping, no leg drive, nothing that sends the top of my head at the ceiling. I do not love the constraint, but strict is what I should have been doing in the first place, so the ceiling did me a favor.
If you cannot do a strict pull-up yet, do not go buy a second piece of equipment. Put a bench or a sturdy chair under the bar and do negatives: step up to the top position, lower yourself for a five count, repeat until you cannot control the descent any more. That is how I went from three reps to eight, and it cost me a few months of patience and nothing else.
Cole, my 15 year old, uses the bar too when he is out here with me, and the fixed height works for him. What it will not do is grow with your ceiling. If you are tall, measure your own reach with your arms straight overhead before you order, because bar height is the one dimension on this rack you cannot change later. Everything else about the setup, you can move. That, you cannot.
Eleven inches of air above the pull-up bar decided how I train. Not the other way around.
What Else Helps
The rack was the second thing I bought. The first was flooring, two rolls of 3/8 inch rubber laid side by side under the rack and bench, because dropped plates were chipping the concrete and the sound was carrying into the kitchen where Dana was trying to hear the news. That floor is what makes the rack usable. Bare concrete under a rack in a hard walled garage is a noise problem before it is anything else.
The bench came in April 2024. I had a wobbly hand me down flat bench I did not trust under a loaded bar, and the replacement arrived nearly assembled. Bench press happens inside the rack now, which is most of the reason to own one at all. Incline dumbbell press, one arm rows and step ups for my cranky left knee all happen on that bench too.
The adjustable dumbbells are the least impressive purchase and the one I touch most. Curls, lateral raises, warm-ups, accessory work, and Cole uses them when he trains with me. They top out at 25 pounds a side, so anything heavy stays on the barbell, and that is fine. One barbell, one rack, one bench and a pair of dumbbells will carry a 46 year old with a bad knee a long way.
Where It Comes Up Short
The warranty is 30 days from the manufacturer, which is short for something you expect to hold a loaded barbell for a decade. Nothing on my CAP rack has failed and I have not needed to test that warranty. But I knew the number going in and I bought accordingly: I assembled it carefully, I rechecked every bolt twice in the first six months, and I do not dump bars on it.
The rack weighs 59.51 pounds. That is light enough for one stubborn man to move, which is good, and light enough to shift if you get sloppy, which is not. The 50 inch depth is honest but it is real estate in a small bay. The pull-up bar sits at 85 inches and there is no version of this where it becomes adjustable. If any of those three are dealbreakers for your space, better to learn it now than after the box is in the driveway.
Squats and pull-ups from one rack, bolted to nothing
46 inches wide by 50 deep by 85 high, 11 and 12 gauge steel, built-in pull-up bar and weight storage. Mine has stood on a rubber mat in a Knoxville garage for two years without a single hole in the concrete.
Amazon Check Today's Price on Amazon →