
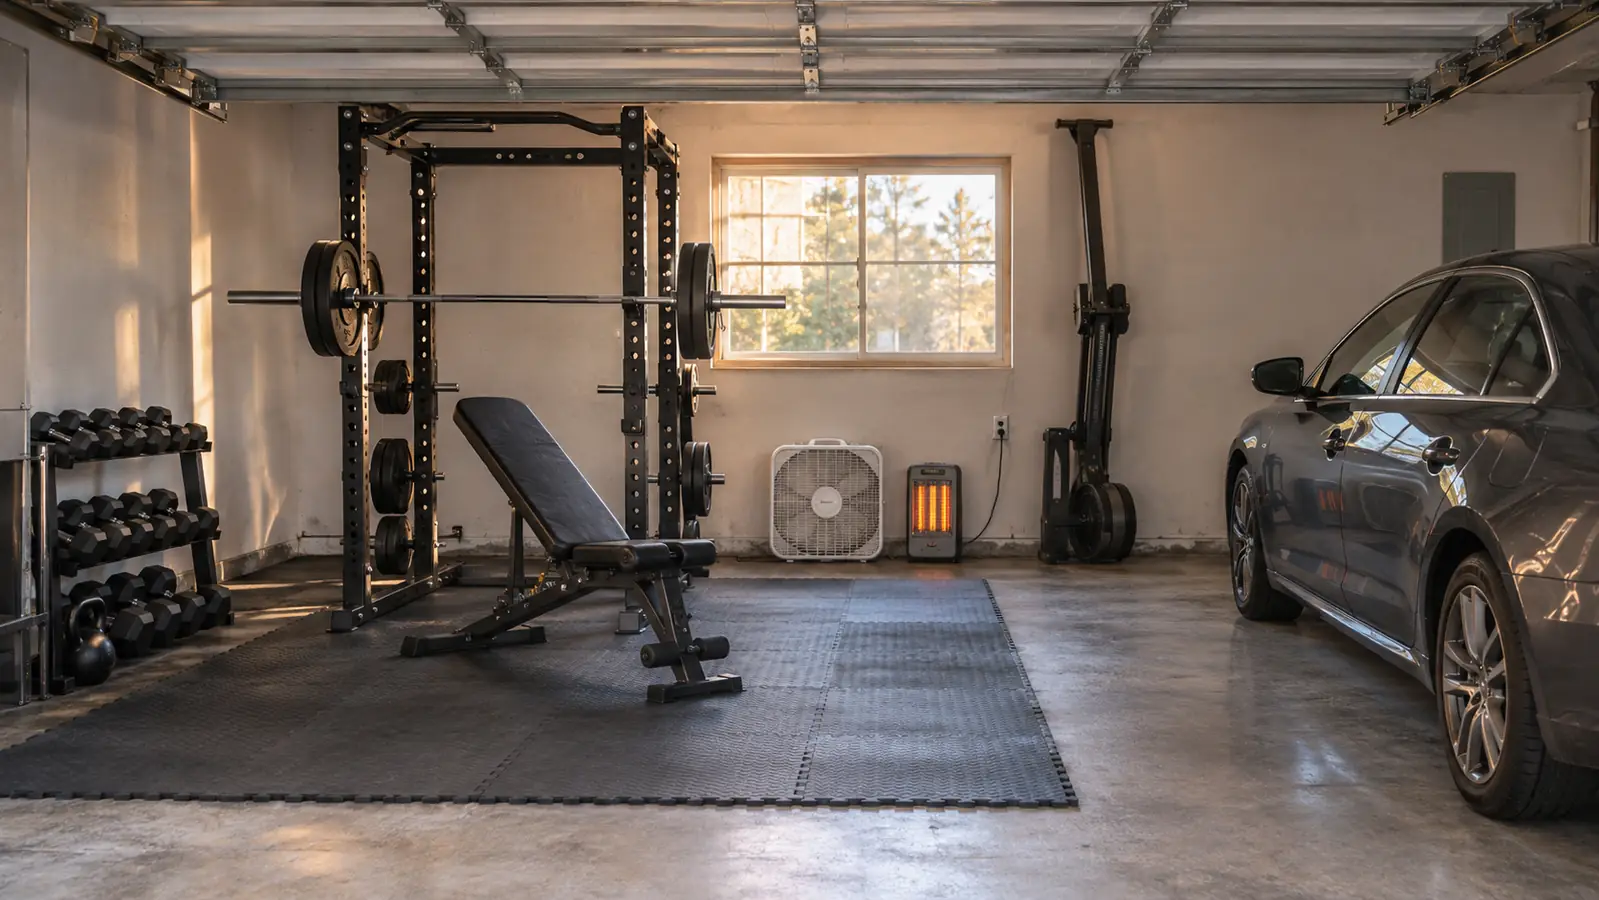
In April 2024 I cut open a box in my garage, pulled out a YOLEO Adjustable Weight Bench, slid two pins into place, and benched on it the next morning at 5:40 before work. No tools. No trip back to the hardware store. That bench has lived in the same left bay of my garage for about a year and a half now, and it is still the piece of equipment I would replace last. But the bench was never the hard part. The hard part was building a station around it that fit an 11 by 20 foot bay, kept the noise out of the kitchen, and stayed set up so I would actually use it at 5:30 in the morning.
Most people do this backwards. They buy a bench, carry it into the garage, and then try to make the room cooperate. I know because I spent two years on a wobbly hand-me-down flat bench before that. The bar hit the wall on one side, the plates had nowhere to land, and I dragged the thing around every session. What follows is the order I would do it in if I were starting the bay from scratch. It is five steps and only one of them is about the bench itself.
The bench that has held up through 18 months of 5:30 AM sessions
98 percent pre-assembled, two pins to set an angle, and an ASTM-certified 827 pound rating. It is the piece I stopped thinking about first.
Amazon Check Today's Price on Amazon →Step 1: Measure the Bay Before You Buy Anything
The left bay of my attached garage is 11 feet wide and 20 feet deep with a bare concrete floor and an 8-foot ceiling. That reads like plenty of room until you put a 7-foot Olympic bar in it. Once the plates are on the sleeves you are close to 8 feet of clear width, which leaves about 18 inches on each side in an 11-foot bay. Enough to load and unload, not enough to be sloppy about where the rack sits. I measured the wall to the truck mirror, the wall to the water heater, and the wall to the door the truck pulls through, because all three of those shrink the usable space.
The ceiling is the other number people forget. The bench itself tops out at 42.5 inches tall at its highest back setting, so overhead clearance is not the issue from a lying position. Standing overhead press is the issue, and so are pull-ups. My rack's pull-up bar sits about 11 inches below the ceiling, which is why I do strict reps and keep my head forward. If you have an 8-foot ceiling and you plan to press standing, get on a step stool with a tape measure before you commit to a rack height. It is a five-minute job that saves a Saturday.
Then mark it out. I used painter's tape on the concrete for two weeks before I moved anything permanently, and I moved the tape three times. A bench press station needs a footprint for the rack, a lane for the bench to slide in and out, and a walk path you can use in the dark without kicking a plate. Tape costs nothing and answers that question better than any product listing will.
Step 2: Get the Floor Right Before You Load It
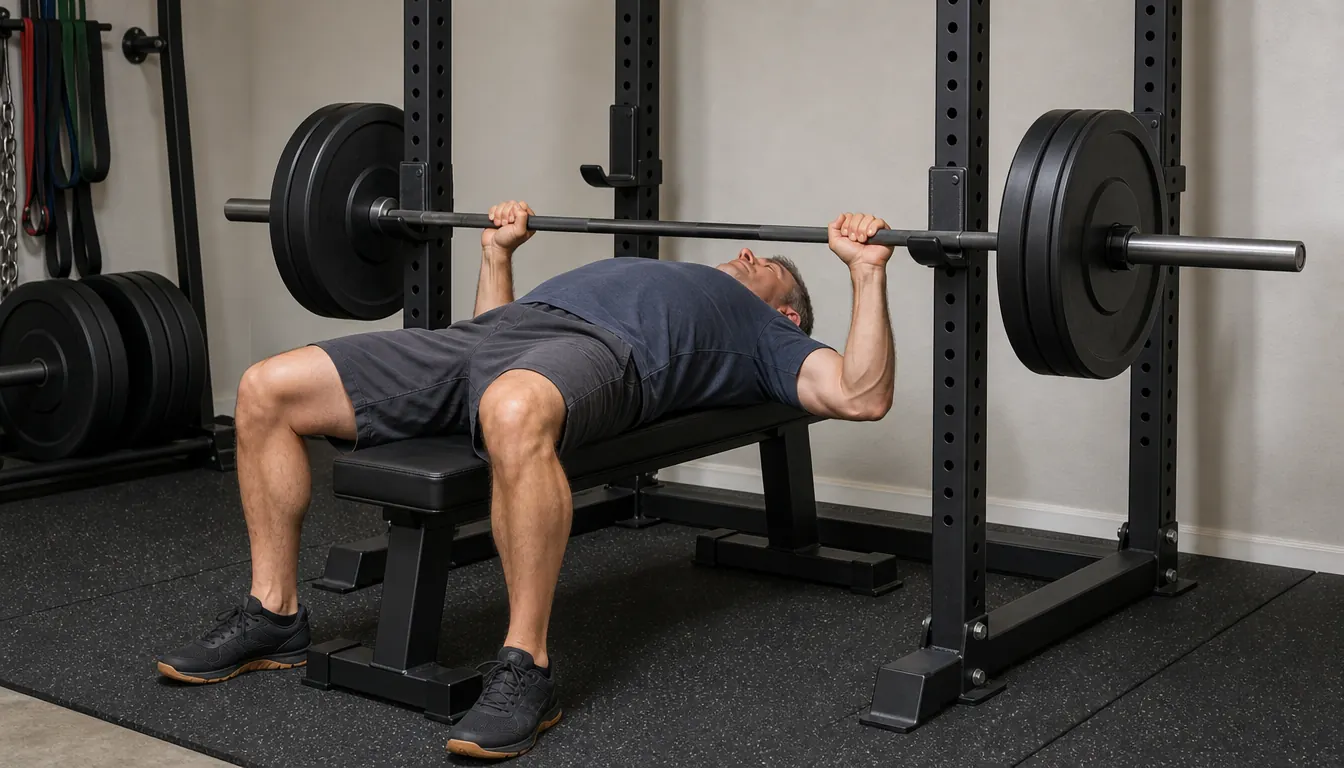
I bought flooring before I bought anything else, back in October 2023. Two rolls of IncStores Tough Rubber Roll at 3/8 inch, 4 by 10 feet each, laid side by side to make an 8 by 10 foot lifting area under the rack and the bench. The reason was simple: dropped plates were chipping the concrete, and the noise carried straight through the wall into the kitchen where Dana was trying to hear the news. The rubber smell was strong for the first few weeks. I left the garage door open and it faded.
Floor before bench is the right order for a second reason. A bench that rocks under you is not usually a bad bench. It is a floor problem. Concrete slabs are rarely dead flat, and a mat laid over a high spot will tilt the bench a quarter inch, which you will not notice setting up and will absolutely notice with a loaded bar over your chest. Sweep, run a straightedge or a level across the area, and decide where the flat zone is before the bench gets a permanent home.
One more decision while the floor is bare: what sits on the mats and what does not. My rack and bench live on the rubber. The rowing machine sits on the bare concrete beside the mats because it does not need protection and I move it constantly. Sorting that out early keeps you from dragging a 200-pound rack six inches every time you want to row.
Step 3: Set the Rack First, Then Place the Bench
My rack is a CAP Power Rack Stand with a pull-up bar, bought a week after the flooring. I assembled it alone in one Saturday afternoon, about two and a half hours, and I bolted nothing to the floor. It sits on the mats under its own weight. Set the rack where the bar path is clear of the wall behind you and clear of anything you might step back into. That usually means the rack sits lengthwise in the bay, with enough room behind the bench for a spotter who will never show up at 5:30 in the morning.
Only then do you place the bench. For barbell benching the bench goes inside the rack, centered on the bar, with the J-hooks set at a height that lets you unrack with a small lift and not a reach. I set the safety arms just below chest height so a failed rep lands on steel and not on me. The bench does not have to be perfectly centered in the rack. It has to be perfectly centered on the bar, and those two are not always the same thing.
When you find the spot, mark it. I put a strip of tape on the mat where the front foot of the bench lands, and I have replaced that tape twice in eighteen months. It sounds fussy. It is the difference between walking out at 5:30 and pressing and walking out at 5:30 and adjusting a bench for four minutes.
Step 4: Set the Bench Angles You Actually Train
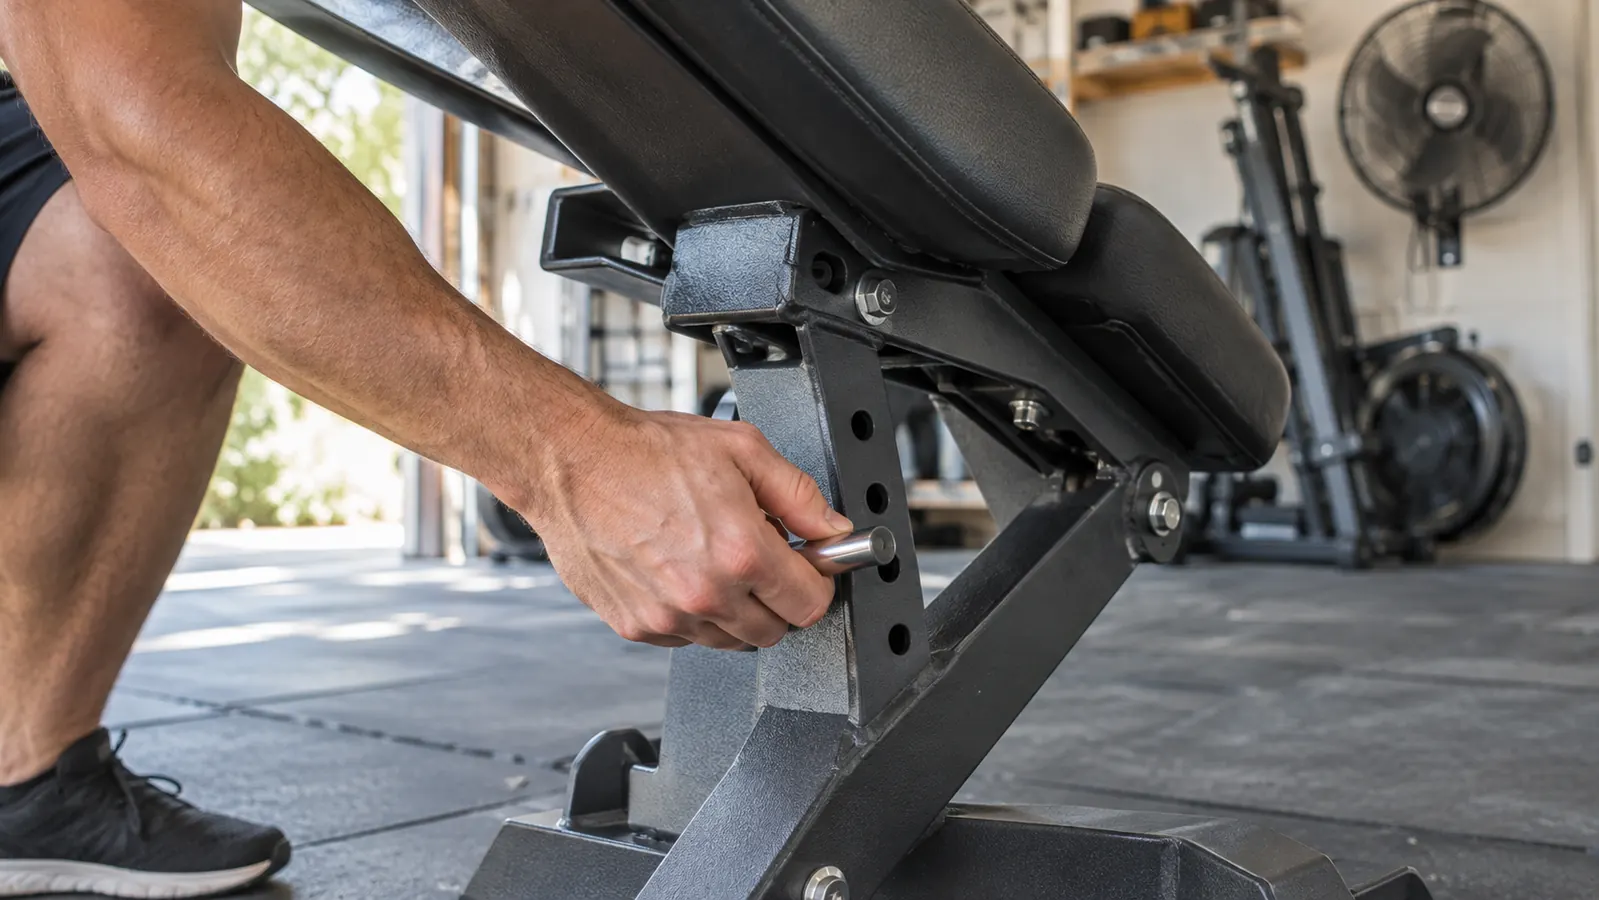
The YOLEO bench is where the station stops being generic. It ships 98 percent pre-assembled, which in my case meant opening the box, inserting two pins, and lifting. The frame is alloy steel, the whole bench weighs 23.2 pounds, and it measures 41 inches deep by 12.6 inches wide by 42.5 inches high. YOLEO rates the capacity at 827 pounds with ASTM certification and lists a maximum user weight of 330 pounds. Those are the manufacturer's numbers, not mine, and I have not load tested them beyond my own 230 pounds of plates.
The adjustment range is the part that earns its keep. There are 84 positions total, built from 7 back adjustments, 4 seat adjustments, and 3 leg adjustments. In practice I use four of them. Flat for barbell work inside the rack. One notch of incline for dumbbell pressing with the Lifepro pair, which tops out at 25 pounds per hand, so the heavy pressing stays on the bar. A steeper incline for one-arm rows. And a low setting for step-ups, which is the only thing that has genuinely helped my cranky left knee, the one I wrecked crawling attics for a living.
Here is the honest part. At 23.2 pounds the bench is light, and light means it will shift if you bump it while loading plates. That is not a defect. It is the trade you make for a bench you can move with one hand and set up in five seconds. A commercial bench in a gym weighs three times as much and never moves, but it also never gets out of the way when Cole wants to do rows on the mat. You are choosing which problem you want. I chose the one I can fix with a strip of tape.
The bench is rated to 827 pounds. What actually decides whether you press tomorrow morning is whether the station was still standing where you left it.
Step 5: Make It Quiet and Repeatable
Noise in a garage gym comes from three places: dropped plates, rattling plates on the bar, and gear you drag instead of lift. The mats handle the first one if you are honest about it. I lower the bar under control and I do not drop it from lockout, not because I am virtuous but because the kitchen is on the other side of that wall and I like my mornings peaceful. The second one is solved with spring collars that actually grip. The third one is solved by picking things up.
Repeatable is the part that matters most. My routine is four mornings a week, 5:30 to 6:20, with rows on two of those mornings plus one weekend session. That window is too short to spend setting up. So the bench stays where it lives, the dumbbells stay on their trays on the floor beside it, and the plates stay loaded on the rack pins in the order I use them. The rower folds up and stands against the wall when the truck needs the bay, and it comes back out for the knee-friendly conditioning work I do twice a week.
The last piece is a small habit. The night before, I set the bench to the angle I plan to start with and check the safety arms. It takes ninety seconds. It also means that on the mornings when I do not want to get out of bed, the station is already built and the only decision left is whether to walk into the garage. Removing that one small friction is worth more than any piece of equipment I have bought.
What Else Helps
A rack with adjustable safety arms is not optional at my age and it should not be optional at yours. The arms catch a failed rep. The J-hooks hold the bar. Those two things plus a bench are the whole station, and everything else is comfort. Beyond that, the useful additions in my bay have been boring: a box fan I run in July, a small space heater I run in January, and a cheap clock on the wall so I stop checking my phone between sets and losing six minutes to it.
The dumbbells are worth a mention because they change what the bench is for. A pair of adjustable dumbbells from 5 to 25 pounds lets me use the incline settings for pressing, curls, lateral raises and rows without dragging out the bar. Cole uses them too, which is most of why they were worth buying. If your knee complains the way mine does, a rowing machine is the other thing that earned its floor space, twenty minutes at a time, folded against the wall when it is not in use. None of it is complicated. The order you set it up in is what makes it stick.
Start with the piece the rest of the station is built around
Two pins, no tools, 84 positions, and a frame rated well past anything I will ever put on it.
Amazon Check Today's Price on Amazon →